I had the exact same issue on my Intel Mac running Windows 10 Pro via Boot Camp — the Windows 11 Upgrade Assistant said my PC didn’t meet the system requirements. That’s because Boot Camp Macs don’t have TPM 2.0 and Secure Boot exposed to Windows. What worked for me was using WinUpgradeMate, which safely handles the upgrade bypass without erasing anything.
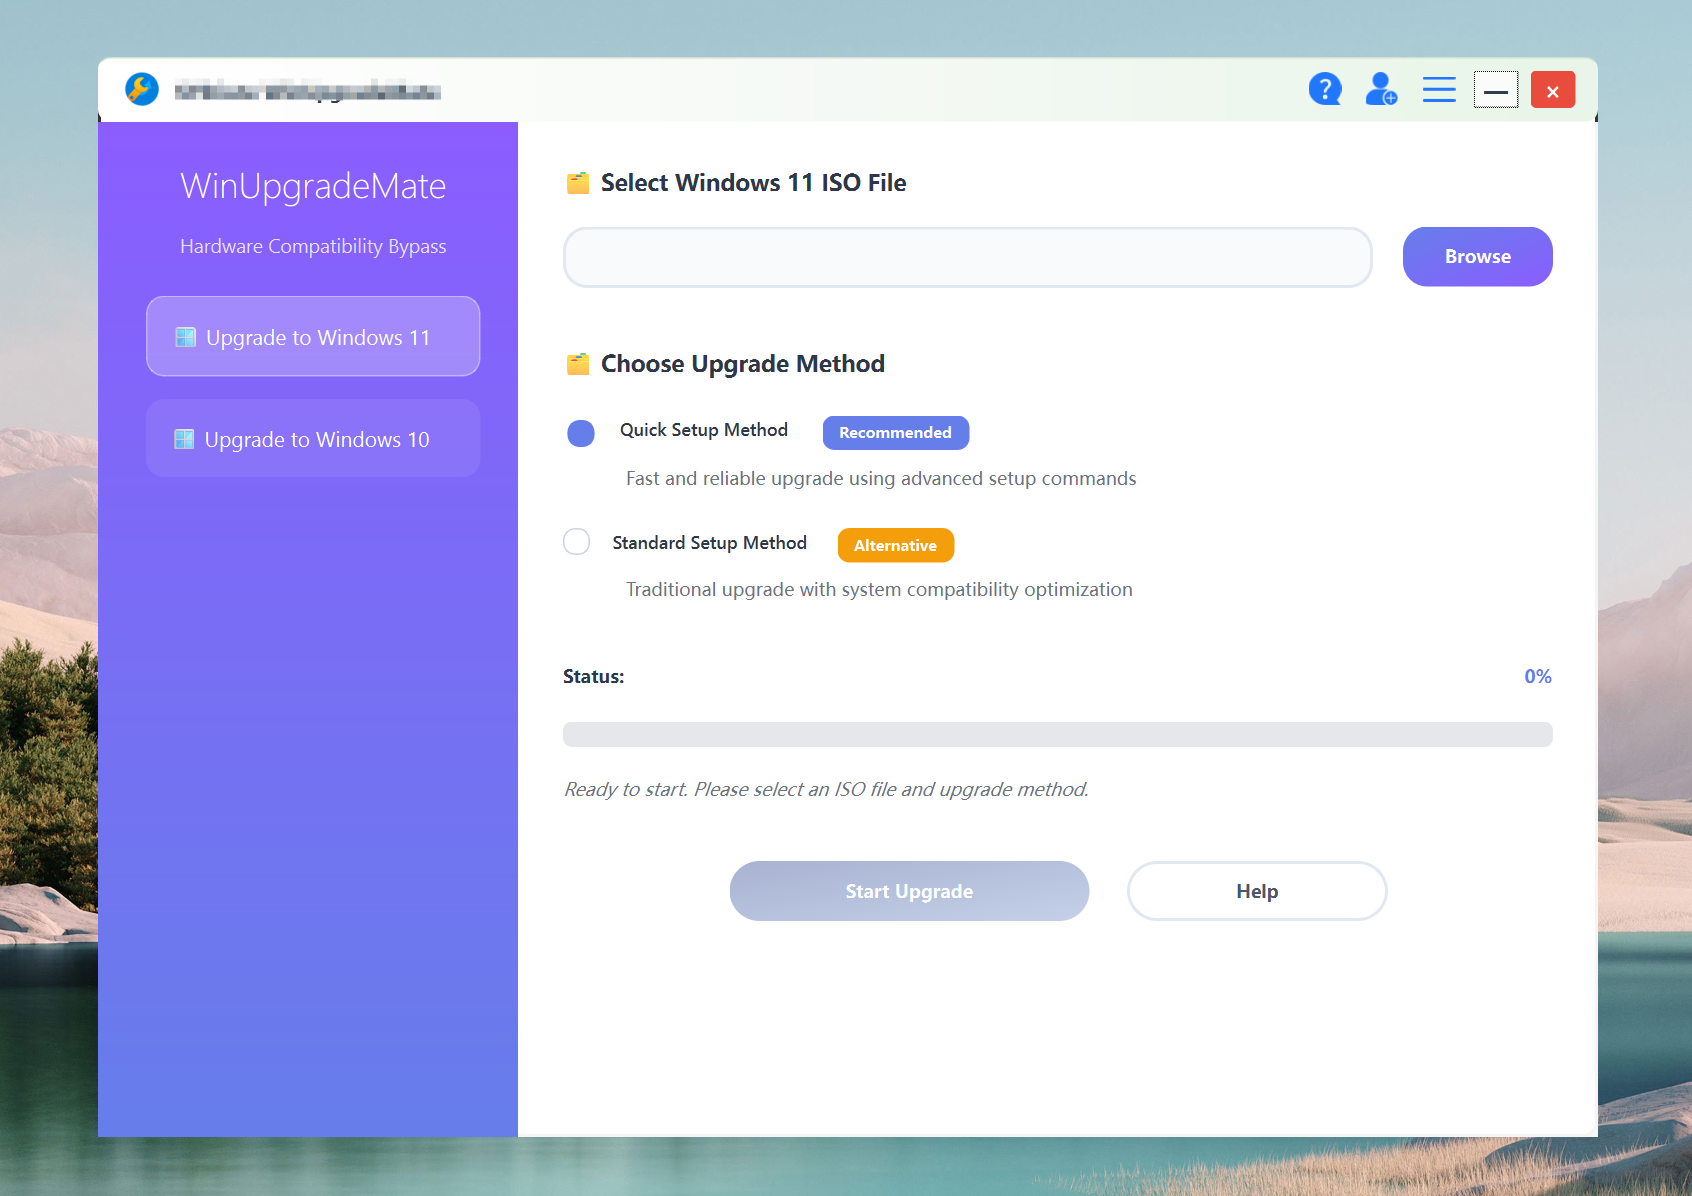
It’s the easiest way to upgrade to Windows 11 from Windows 10 on unsupported hardware.
• Open WinUpgradeMate on your Windows 10 installation.
• Open it, select Upgrade to Windows 11, and it’ll automatically create the Microsoft-supported registry key (AllowUpgradesWithUnsupportedTPMOrCPU=1).
• It mounts the Windows 11 ISO and starts setup automatically — just pick “Keep personal files and apps.”
• Once it completes, you’re running Windows 11 with all your files intact.
Before starting, make sure you’re using an Intel Mac (Boot Camp doesn’t support Apple Silicon — Install Windows 10 on your Mac with Boot Camp Assistant - Apple Support) and that macOS’s Startup Security Utility is set to Medium Security and Allow booting from external media (About Startup Security Utility on a Mac with the Apple T2 Security Chip - Apple Support).
Alternative: If you want to do it manually, the command-line method also works fine and doesn’t need any tools.
• Mount your Windows 11 ISO in Windows 10 (right-click → Mount).
• Open Command Prompt as Administrator and enter:
reg add "HKLM\SYSTEM\Setup\MoSetup" /v AllowUpgradesWithUnsupportedTPMOrCPU /t REG_DWORD /d 1 /f
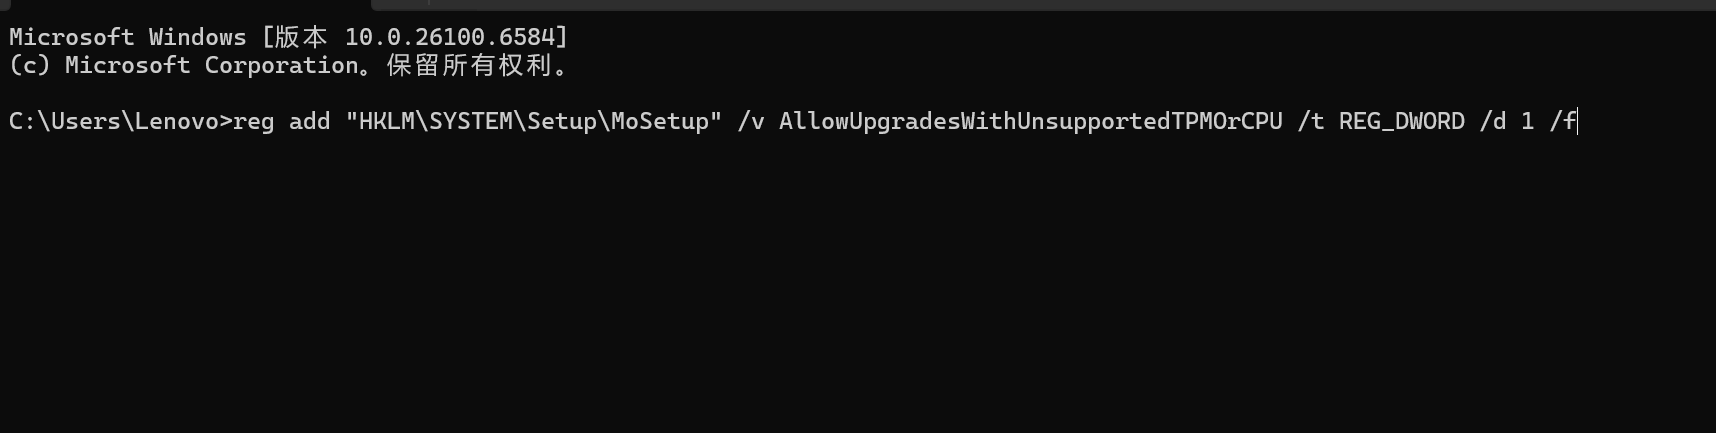
• Then remove the appraiser file that causes the block:
del X:\sources\appraiserres.dll
(Replace X: with your mounted ISO’s drive letter.)
• Run the installer:
X:\setup.exe
• Choose Keep personal files and apps and finish setup.
This lets you upgrade to Windows 11 from Windows 10 safely with your data untouched, all through official components.
Why it happens:
Boot Camp Macs don’t expose TPM 2.0 to Windows, so Microsoft’s installer flags them as unsupported. Adjusting Startup Security in macOS (About Startup Security Utility on a Mac with the Apple T2 Security Chip - Apple Support) and using this registry path resolves it.
If you ever need to tweak the Mac side again, Apple’s macOS Recovery doc explains how to restore or change these security settings (How to start up from macOS Recovery - Apple Support).