How to recover DaVinci Resolve project database from a MacBook Pro (2023) after a clean install?

Hi, I'm having trouble recovering data from my Mac and I was hoping someone could help.


Here’s the situation:

My Mac: MacBook Pro (2023), running macOS Sequoia.


Two days ago I did a clean install because of some app issues, but I later realized I had forgotten to back up my DaVinci Resolve project database. This is the data I need to recover.


Using my wife’s MacBook Air (2024, macOS Tahoe), I downloaded the Sequoia installer and created an external bootable SSD (SanDisk Extreme Pro Portable SSD). My plan was to boot from that SSD, run Disk Drill, and recover the DaVinci data.


However, when I try to boot from the external SSD, the installer appears in the Startup Options screen, but pressing “Continue” does nothing (as shown in the photo). The selection highlights briefly and then returns to the same screen. I’ve tried making the installer both from the App Store and using createinstallmedia in Terminal, but neither version works.


If anyone knows a workaround for this, I’d really appreciate it.


Alternatively, if there is any way to make my Mac appear as an external disk on my wife’s Mac (similar to Target Disk Mode on Intel Macs), that would also solve my problem. From what I understand, Apple Silicon no longer supports Target Disk Mode, and “Share Disk” only exposes a network share, which recovery software cannot scan at the block level.


Thanks in advance for any advice.


[Re-Titled by Moderator]

Original Title: MacBook

MacBook Pro 16″, macOS 15.7

Posted on Nov 20, 2025 2:11 PM

Reply
Question marked as Top-ranking reply

Posted on Nov 24, 2025 1:00 AM

Right now it’s better to stop attempting with the external-boot issue and focus on getting a full macOS environment running on something that can actually scan your internal SSD. On Silicon Macs , a clean install plus normal use for even a day or two usually means TRIM has already wiped a lot of deleted blocks, so recovery is time-critical. The mistake is creating a bootable installer, what you actually need is a full macOS install on the external SSD.


Boot into Recovery > Options, erase the external drive (make sure you’re erasing the physical disk), format it as APFS, and then choose Install macOS and point it to that external SSD. Avoid using the DFU port when doing this. Once Sequoia or Sonoma is fully installed and you can boot from the external OS, install Stellar Recovery and run the scan on your internal SSD.


This setup bypasses the ownership/security block, avoids the endless installer loop, and gives you the only environment that can still read unallocated space before TRIM finishes wiping it. The sooner you scan, the better your chances of getting the Resolve database back.

24 replies
Question marked as Top-ranking reply

Nov 24, 2025 1:00 AM in response to hirohisa132

Right now it’s better to stop attempting with the external-boot issue and focus on getting a full macOS environment running on something that can actually scan your internal SSD. On Silicon Macs , a clean install plus normal use for even a day or two usually means TRIM has already wiped a lot of deleted blocks, so recovery is time-critical. The mistake is creating a bootable installer, what you actually need is a full macOS install on the external SSD.


Boot into Recovery > Options, erase the external drive (make sure you’re erasing the physical disk), format it as APFS, and then choose Install macOS and point it to that external SSD. Avoid using the DFU port when doing this. Once Sequoia or Sonoma is fully installed and you can boot from the external OS, install Stellar Recovery and run the scan on your internal SSD.


This setup bypasses the ownership/security block, avoids the endless installer loop, and gives you the only environment that can still read unallocated space before TRIM finishes wiping it. The sooner you scan, the better your chances of getting the Resolve database back.

Nov 21, 2025 12:46 PM in response to hirohisa132

Okay, running through everything again, it's actually much easier than it used to be.


Starting with a step back, I need to clarify this statement: You need to boot into Recovery Mode and explicitly grant permission with your admin password for an external device to be bootable.


This isn't necessary. That old thought came from when I had booted to an external drive and literally wiped the internal SSD on the M2 Pro mini. I had to go into Options (Recovery Mode) and make the external drive pre-boot device so I could prep the internal drive to accept a reinstall of the OS. After all that was done, I once again set the internal drive as the pre-boot device. Lesson there is, don't do that. 🙂


Per this image:


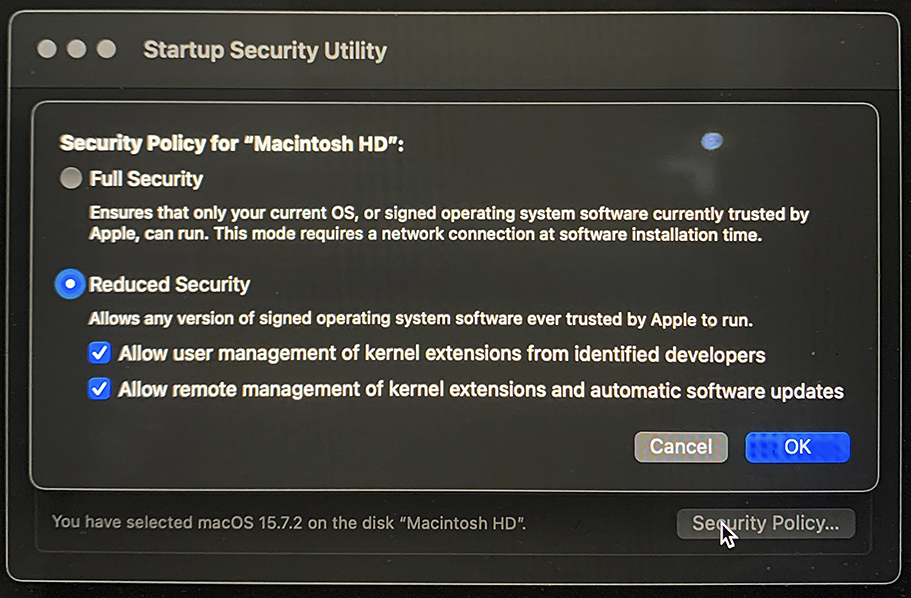
Don't do that, either. It opens up your Mac to possible external exploits, and doesn't help with what you're trying to do anyway. Put it back to Full Security.


You have a fault with your initial attempt, which I didn't notice the first time. What you did was turn your external drive into an installer, not a bootable OS. Don't know why, but while the Mac will boot to a thumb/flash drive like that, it won't to an external drive. But I also must add I can't be 100% sure on that. It's another one of those, "I haven't tried that again for a long time."


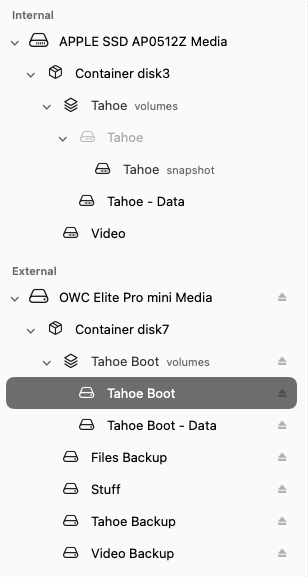
I simply created a new volume on my OWC external drive (named it Tahoe Boot) and launched the Tahoma installer from my main startup volume. The install finished in about 15-20 minutes and as expected, booted to the external when it was done. I didn't need to do anything special to make that happen.


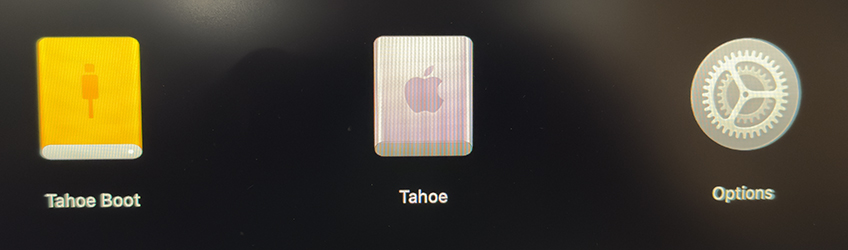
Both installs of Tahoe are selectable on a cold power button startup, or in the System Settings to choose either one as the startup disk.


Because I (temporarily) have two physical, bootable drives, when I go into Options and login with my admin account, I first see this under Startup Security Utility:


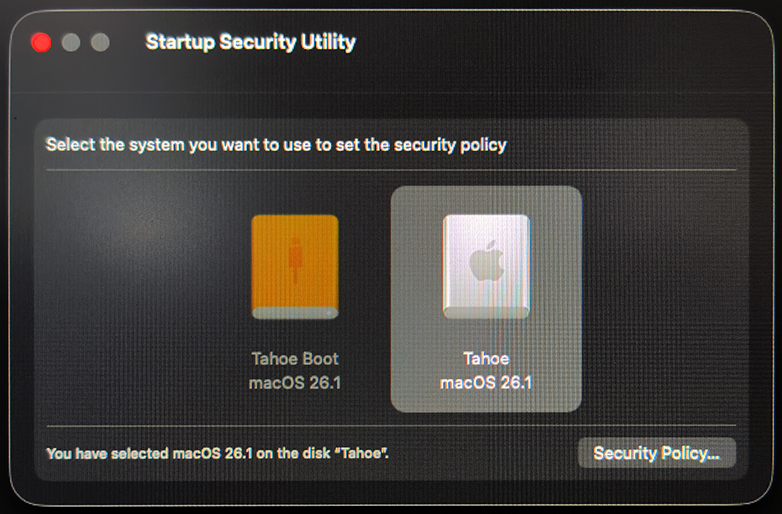
The internal drive is still the pre-boot volume (automatically selected), but the firmware is giving me the option to change it to the external drive, if I wanted to do that. Since I didn't, I clicked Security Policy, which then goes to screen where you can choose Full or Reduced Security.


Some extra reading that explains this well. Fellow forum member, HWTech, is quite the whiz at this stuff.


Is it possible to boot a Sonoma MacBook A… - Apple Community


The most notable part, relative to this discussion is this:


In fact the internal SSD of an M-series Mac will always have the preboot files for the highest OS that is installed on the system (internal or external....those preboot files are shared).


If anything happens to those internal preboot files or the internal SSD fails, then you will not be booting an M-series Mac at all. Those preboot files on the internal SSD of an M-series Mac used to be within the system firmware on the Intel Macs.


Anyway! What I would do is do a cold startup to the Options firmware, login, and use Disk Utility to erase the external SanDisk drive. Then quit Disk Utility to get back to the options screen. Then choose to install the OS. Make sure to select the external drive so you do not write anything to the internal !!!


If you can't select the SanDisk drive from the Options screen, STOP! Go back to your wife's Mac and make a bootable flash/thumb drive with Sequoia on it. Bring that completed flash drive over to your Mac, plug it in and do another cold start so you can select it as the startup drive. This should work. Then proceed with installing Sequoia on the SanDisk external drive.

Nov 21, 2025 4:06 AM in response to hirohisa132

hirohisa132 wrote:

Using my wife’s MacBook Air (2024, macOS Tahoe), I downloaded the Sequoia installer and created an external bootable SSD (SanDisk Extreme Pro Portable SSD). My plan was to boot from that SSD, run Disk Drill, and recover the DaVinci data.

However, when I try to boot from the external SSD, the installer appears in the Startup Options screen, but pressing “Continue” does nothing (as shown in the photo). The selection highlights briefly and then returns to the same screen.


This may have to do with Apple Silicon Macs having a concept of Ownership that is in addition to the concepts of local Admin accounts, and of Apple IDs. Your Mac's security policy might not have permitted it to start up from a disk prepared on your wife's machine (which has a different Admin account and a different Owner).


I'm not real clear on the details, but it seems like a possibility.


However, even if you could make a usable external boot disk, your data is likely gone forever, for the reasons that others have described.

Nov 21, 2025 6:55 PM in response to hirohisa132

hirohisa132 wrote:

hey guys thanks for all the care and support. i've lowered down my mac's security policy but still booting from the external hard drive didnt work. I'll try keep on struggling but deadline for work is approaching at the same time. may have to just let it go at some point. fingers crossed.

The trick to installing macOS onto an external drive on an M-series Mac is making sure to avoid using the DFU Port during the install process.....any USB-C port can be used once the external drive has a full version of macOS installed. The hardest part is figuring out which USB-C port is the DFU Port which should be avoided since Apple has not standardized on it & their instructions are very confusing. See the following Apple article:

How to use an external storage device as a Mac startup disk - Apple Support


Also, I was actually able to use an external full macOS boot drive with two different M-series Macs which had totally different users on them. (I was surprised since I thought that failed years ago).


A full macOS external boot drive made on an M-series Mac cannot be used to boot an Intel Mac. Same with an external full macOS boot drive made on an Intel Mac not being able to boot an M-series Mac. IIRC, it will prompt you to reinstall macOS if you try to boot it on the other platform.


The macOS USB installer is universal and will work on either an Intel Mac or an M-series Mac regardless of the Mac used to create the bootable USB installer. The macOS USB installer will only show up as an option on the Option Boot or Startup Options screens. The installer will not show up under the Startup Disk System Settings since it doesn't need to be the default boot option as it will only be used the one time.


Macs can be picky about the drives used for booting. It is also best to erase the whole physical external drive as well just to make sure the partition table is recreated like macOS likes it....see the following article for details (I think this older version archived on the Wayback Machine is better than the current version of the article):

https://web.archive.org/web/20250909095655/https://support.apple.com/guide/disk-utility/erase-and-reformat-a-storage-device-dskutl14079/mac


Nov 20, 2025 2:22 PM in response to hirohisa132

Assuming you made a backup of some kind, you'll find all of your projects here:


/Users/your_account/Library/Application Support/Blackmagic Design/DaVinci Resolve/Resolve Project Library/Resolve Projects/Users/guest/Projects


Simplest thing to do is open the Application Support folder in your user account, and then copy the entire Blackmagic Design folder over to the same location.

Nov 20, 2025 4:46 PM in response to Grant Bennet-Alder

It depends. Like any other file recovery software, it doesn't rely on the file table to find anything. It looks for Beginning of File (BOF) markers and follows each one through its connected sectors/cells to the End of File (EOF) marker.


The catch with SSDs is TRIM. The sooner you try to recover files, the better chance you have of recovery. But if TRIM has reset a block where those files are, then chances of recovery are slim to none.

Nov 21, 2025 10:52 AM in response to hirohisa132

That's the M series screen and is not the droid you're looking for.


It'll be a good hour or so before I can post with instructions (I'll have to take pictures of the screen for certain steps). But, I'm going to temporarily make a bootable partition on my external drive to go through all of the steps. It's been a long time (like since Catalina or Monterey) since I last had a bootable external set up for an M2 Pro mini.


It'll be interesting to see if it can still be done.

Nov 24, 2025 7:29 AM in response to hirohisa132

Now that you are past this near-death experience, its time to make plans to NEVER be in a similar situation again.


If you are using another direct-to-disk backup method that you prefer, and you currently have a recent disk-based backup, that is great. If not, you should consider using Built-in Time Machine. Take steps to acquire an external drive as soon as possible. If you buy one, a drive 2 to 3 times or larger than your boot drive is preferable for long term trouble-free operation. Do not pay extra for a drive that is fast.  (You can get by for a while with a "found" smaller drive if necessary, but it will eventually become annoying).


Attach your external drive and use

Settings > General > Time machine ...


... to turn on Time Machine and specify what drive to store your Backups on.  It may ask to initialize the new drive, and that is as expected. APFS format is default format if running MacOS 11 Big Sur or later.


Time machine works quietly and automatically in the background, without interrupting your regular work, and only saves the incremental changes (after the first full backup). Time machine backs up your machine — including every connected drive that is in a Mac compatible format. it can not back up Windows format drives.


Time Machine's "claim to fame" is that it is the backup that gets done. It does not ruin performance of the rest of the computer while doing its backup operations. You do not have to set aside a "Special Time" when you only do backups. When you need it, your Time machine Backup is much more likely to be there and be current.


How to use Time Machine to Backup or Restore your Mac:

Back up your Mac with Time Machine - Apple Support


Time Machine may spend all afternoon making your first full backup. You can continue to do your regular work while it does this. The first Full Backup is by far the biggest backup.


————

Time Machine saves, and can re-create, ANY Moment in time for which it still holds backup files.


Example: a user posted that they had installed software that messed up their files. it was installed mid last week. They had done an ordinary restore to recover, but that restored to yesterday, and the problem was still there.


Readers were able to guide them to Time Machine.APP (not to be confused with Time machine preferences). This allowed them to look at the state of the major folder involved, back in time through each previous backup, until right BEFORE the bad software was added -- mid last week-- and restore as of that moment. They were thrilled.


-------

YES, there are other backup solutions as well. But until you decide on a different plan, enabling Time Machine now gets you coverage now, and you can transition to a different backup method at your leisure.

How to recover DaVinci Resolve project database from a MacBook Pro (2023) after a clean install?

Welcome to Apple Support Community
A forum where Apple customers help each other with their products. Get started with your Apple Account.